We would be landing at Calgary and driving through to and leaving from Vancouver with a number of stops on the way and a flexible itinerary. I had no idea where to go for float training, so I put a posting on the ever reliable Flyer Forum fishing for personal recommendations. It wasn’t long before an experienced instructor who used to do training on floats in Vancouver came back and recommended two places. One in Kelowna (a bit south of my planned track) and one in Fort Langley near Vancouver.
So I made email contact with Fort Langley Air Limited and received a friendly and prompt reply. I made a booking for Monday 26th March and was asked to contact them when I made it to Vancouver to firm up on this. We got to the area early on Sunday, so I thought why not drop in and introduce myself. We found the place easily (courtesy of Goggle Maps) and it had a lot of aircraft, both floats and conventional. It was very quiet, but I spotted a car at the far end so wandered down to search for life. The aircraft line up was great, there were all sorts! Meaty Beavers with huge radial engines on floats, one with tundra tyres that were so huge they looked like a cartoon!
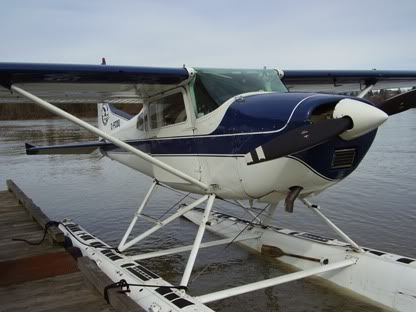
I was greeted by the owner, ‘Pappy’ who lived up to his name. He was friendly and clearly vastly experienced. I introduced myself and we got acquainted. He gave me a quick tour and pointed out both the 4000’ grass strip as well as the piers for float planes. The place is right on the Langley River very near the historic Fort Langley, the first permanent settlement in British Columbia. The school itself is small and there are only two planes for float training. One is a Super Cub and the other is a Cessna 180. I opted for the Cessna 180 so I could get the wife in the back, that and I had not flown a C180 before, so double bonus.
He gave me a quick chat about the differences of float plane handling and I gave him a run down on my experience to date. He confirmed that I would be flying with one of his instructors and the weather looked good for tomorrow. So we made a time for 10:00.
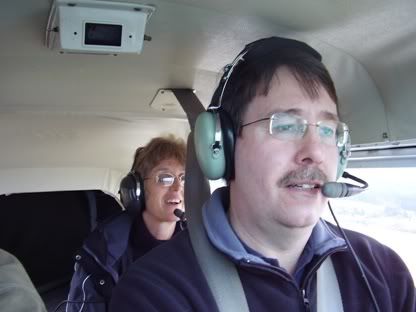
I got there on time to be greeted by an extremely tall guy who was to be my instructor. He had to be 6’ 6” – I am 6’ 2” and he made me feel small! We got on well and brought him up to speed on my flying experience to date and said I wanted primarily a float plane training lesson, with sightseeing as a vague secondary objective. He was happy with this as he said ‘Great – so you’re doing all the work!’.
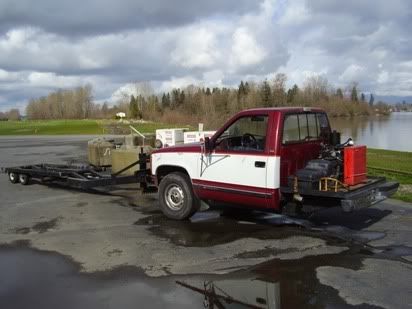
He again explained the techniques involved and that we would be doing mainly take-offs and landings, and lots of them! We did the walk around and climbed in while the plane was still on land. Pappy then appeared in a old 4x4 which had been cut in half (yes really!) and had a dolly wheel assembly welded on the front. This hooked up to the plane as he pushed the plane around and down the ramp into the water.
John helped me with the start procedures as I did not have a checklist for the plane. The controls were standard Cessna (vernier) but the flaps were the mechanical ‘Piper’ type (which I prefer anyway). We had to get the plane started and the rudders down fairly sharpish as we were now drifting downstream in the current – no time to hang around on floats!
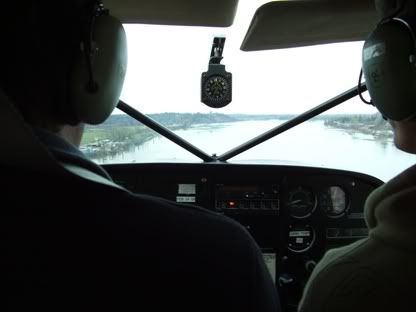
Once the engine is running, you simply use the rudders as normal to steer, except of course they are turning water rudders not the nosewheel. We played with this for a bit while John talked me through the take-off sequence. We pointed out towards the middle of the river and did the power checks quickly on the move (there is of course no other way of doing them on floats – you can hardly use the park brake!). Power checks complete and we started the take off run. John had me do the first one while he followed through on the controls, which surprised me a bit as I thought it would be the other way around. However, he talked me through calmly, clearly and very professionally all the way.
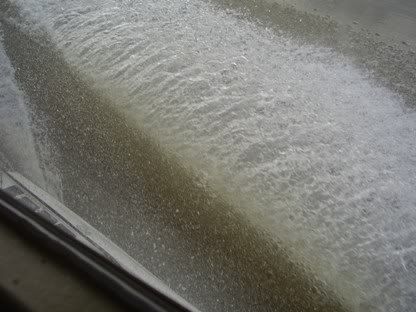
First it’s 20 degrees of flaps then full power with right rudder to hold straight. The yoke is held back as the aircraft picks up speed and accelerates with a nose high attitude. Glance out of the side window to watch for where the wake is on the floats. Once the wake ‘comes back’ and reaches the ‘step’ in the float, relax back pressure on the yoke (i.e. don’t actually check forward, almost let it go to neutral) and allow the aircraft to nose down a bit into the ‘step attitude’. Then hold back pressure to keep the prop out of the spray and watch the airspeed as the speed builds up slowly. The water was pretty smooth, almost ‘glassy’ for the first run, so there was little bouncing or thumping. At about 60 mph (yes it was calibrated on the outside of the ASI in the dreaded MPH), the plane gently unstuck and started flying in ground effect – we were off!
As instructed, I held it level off the water while the speed built up and pulled the power back to 24” and wound the RPM on the VOP prop back to 2400. Water rudders up and once established in the climb at 90 mph, flaps off one stage at a time.
Well, that was the take-off. Different and vital to get it right as any nose level or down or mis-judgement while transitioning to the ‘step’ could result in the front of floats catching a wave and digging in and whole plane then tumbling ass-over-teakettle in the water! So no pressure then!
We climbed to a lofty 800’ following the course of the river so we would clear the power lines. John showed me how to turn the plane and graphically demonstrated that the plane would not turn with ailerons alone, all it did was continue to fly the same track but tilted over! With the ponderous and heavy pontoons and draggy rigging, the plane needs co-ordinated use of rudder and aileron. So I used my experience of flying the poorly harmonised Super Cub and found that worked a treat. John got me to do a few tight turns in the confines of the river valley, which was a lot of fun with an obvious incentive to get it right.
Then of course the landing. As we were flying upstream, John simply picked a patch of river and said ‘OK, we’ll land ahead towards the south bank of the river’.
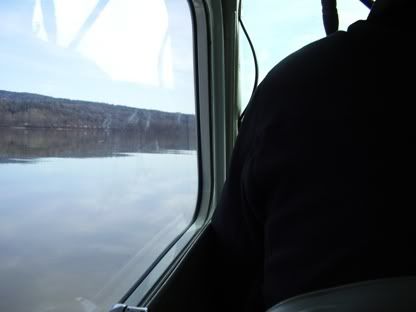
The key to this as he explained was to always try to land near to the shore, not for safety as I naively thought, but to provide a peripheral visual reference, otherwise, it was very hard to judge height, especially with the dreaded ‘glassy water’. It is one of those things that until you have done it, you think ‘yeah yeah, sure!’ and assume they are exaggerating – a bit like how tough it is to fly in solid IMC and that your body cannot tell banked from straight and level – until you have done it you can’t understand how it can be that tough.
So we go into the landing sequence. Power back to almost idle. Prop to fully fine. Line up and click on two stages of flaps. Get and maintain 80 mph. Keep the descent going. Judge the height, start the round out and assume the ‘step’ position. The step position is the attitude of the plane when it was flying ‘on the step’ during the take-off run. For this aircraft that means a bit nose high, but nowhere near as nose high as a fully stalled landing or a taildragger landing – you just have to ‘lock’ the picture in your head. By now you are not far off the water and must carefully regulate the rate of descent using power so it eases down slowly (there are no shock absorbers on floats and water is hard!). Hold the position and play with the power and yes, it touches on the step. Power to idle and hold the back pressure. Under no circumstances ease off the back pressure. As the plane slows it comes off the step and you must have the yoke fully back as it does so or the plane can lurch forward and dig in. Hold back pressure until stopped. Once it has stopped, drop the water rudders and steer as normal – well as you would normally for a boat fighting a current that is. John made it clear that unlike a runway landing, you could not relax for a moment until the plane was shut down and securely tied up.
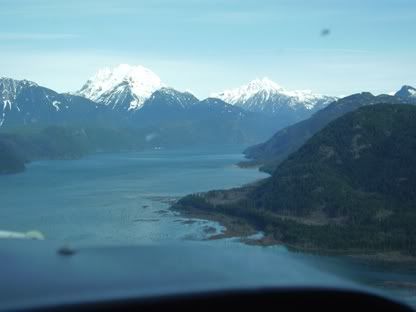
Well the first landing went fine, albeit with help and talk through from John. We then did several more take-off and landings with touch and go’s on the river. He asked if I fancied a lake landing – of course! So we climbed to a dizzying 1500’ and headed a short distance inland to hydro lake. The lower end was bristling with the remains of tree stumps – not a good place to land. As we headed for the middle of the lake, the valley was forcing a wind which was creating some whitecap waves. John thought it better not to land there, so we headed back to the Langley River.
We did a low approach to a more narrow part of the channel between an island and the south bank which had me setting it up for landing on base at 400’ and during the short final turn – fun!
Well basically we did about 10 take-off and landings with some tight turns other bits of handling. I think it was on only one of the landing that I ‘bounced’ it and that wasn’t too high and was fairly easily controlled. The others it seemed to me were pretty good and John agreed (after he peeked through the fingers he had firmly clamped over his eyes for most of the time that is!).
We taxied in and tied up at the moorings. John had to give me instructions as he leapt out to secure the line. There was no bump so I guess we got that right too.
I got a good de-brief and John seemed very happy with lesson – I know I was! Apparently, a conversion course is normally a minimum of 7 hours, six dual and one solo. I was up for 1.3 hours and I was certainly tired at the end of it. A lot of concentration and work, but wow – what fun! I was relieved of $CAN 360 odd but hell, it was great.
Would I do it again – yes! Would I try for a float plane rating – Yes! This was a really great session and I enjoyed it hugely. I strongly recommend that any pilot tries this at least once (along with aerobatics and taildragging and yes, possibly gliding, but I haven’t done that yet). If all you do is fly nosewheel tourers, you really don’t know what you are missing!
Who knows, one day?